
Cream dotted minky baby blanket beside a sage green fleece blanket in a nursery

Minky vs Fleece for Baby Blankets: Softness, Weight and Washing

Choosing a blanket fabric for a baby is different from choosing one for yourself A baby blanket has a harder job than any other blanket in the house: washed constantly, chewed, dragged across floors and loved to pieces — and it has to stay soft through all of it. When parents ask whether minky or fleece makes the better baby blanket, they are really asking three things: which feels gentler, which survives the washing machine, and which is the right weight for a small body that overheats easily. The short answer: both make lovely baby blankets, for different uses. Minky is the softer, plusher fabric — the one babies reach for. Fleece is the lighter, tougher, easier-care workhorse — the one parents reach for at 2 a.m. when the blanket needs washing again. Here is the full comparison. Both are available by the yard at ValentinaTextile.com in the Minky & Fleece collection — order a yard of each and let the baby decide. What minky actually is Minky is a plush polyester fabric with a short, dense pile and a famously silky hand — like stroking a stuffed animal. Our Minky Dot adds a raised dot texture babies love to touch; the rosebud range has a delicate embossed floral pattern. The texture is part of the fabric, not printed on, so it does not wash off. That pile is minky’s greatest strength and its one trade-off: it traps air, so minky feels warmer and cosier than its weight suggests — lovely for winter naps and chilly nurseries. But it also makes minky feel heavier and need a little more care in the wash. It is the comfort fabric: the blanket that becomes the favourite. What anti-pill fleece actually is Fleece is a brushed polyester fabric with a soft, napped surface on both sides. The “anti-pill” part matters: ordinary fleece forms little balls of fibre — pills — after repeated washing, which roughen the surface. Anti-pill fleece resists that, so the blanket stays smooth through dozens of washes. Our Anti-Pill Fleece collection is made for this kind of hard use. Fleece is lighter than minky for the same warmth, dries faster, and is famously forgiving: it does not fray, sews easily, and tolerates a normal wash cycle. Its matte, even surface makes it the better choice for a blanket that will be embroidered, appliquéd or printed. Softness: minky wins, but fleece is no slouch On pure softness, minky wins. Its dense pile is softer than any fleece — minky is the fabric most often chosen for the “lovey”, the small security blanket babies carry everywhere. If softness is your only criterion, minky is the answer. But fleece deserves more credit than it gets. Good anti-pill fleece is genuinely soft against the skin, with a smooth, even nap that stays that way because the anti-pill finish stops the surface roughening. For sensitive skin, either fabric works well once washed; minky feels luxurious, fleece comfortably soft. Many parents make the main blanket from fleece and add a minky border — plush feel for the baby, easy care for the parent. Weight and warmth: think about the nursery, not just the fabric Babies overheat easily, so a blanket’s weight matters as much as its warmth. Minky feels heavier and warmer because of its dense pile — ideal for winter, air-conditioned rooms, and babies who kick covers off. In a warm nursery, though, that same warmth can be too much. Fleece is the lighter, more breathable option, giving good warmth across a wider range of room temperatures — a single layer in mild weather, doubled up in the cold. For one blanket to use all year, fleece is the safer bet; for a special winter blanket in a cold house, minky is the cosier choice. Our Winter Blanket Fabrics guide compares fleece, minky and flannel for cold weather. Washing and care: the part parents care about most This is where fleece pulls ahead: a fleece baby blanket can go in the machine on a gentle or normal cycle with mild detergent, comes out soft, and dries quickly. That matters when the blanket is washed two or three times a week — which, with a baby, it will be. Minky needs a gentler routine: wash cold on a gentle cycle with mild detergent, no fabric softener — it coats and flattens the pile — and air-dry or tumble dry on low. Line-drying keeps the pile at its best; a quick shake before drying restores the loft. Whatever fabric you choose, wash the blanket before first use — it softens the fibres and removes any finishing residue. Sewing a baby blanket: what to expect from each fabric Both fabrics are beginner-friendly, but they behave differently under the needle. Fleece is the easier sew: it does not fray or slip, and it presses and pins without fuss. A simple two-layer fleece blanket is a genuine first project: cut two rectangles, sew right sides together, turn, topstitch, done. Minky needs a little more patience: its pile can shift while you sew, so pin generously — or use fabric clips, which grip the pile better — and sew slowly. The classic baby blanket pairs minky on one side with smooth cotton or fleece on the other — plush feel for the baby, a stable layer for the maker. If you are pairing minky with another plush fabric, our Minky vs Faux Fur comparison explains how the two differ. The verdict: which fabric for which blanket? Choose minky when softness is the priority: the favourite lovey, the special winter blanket, the gift blanket that feels luxurious the moment it is unwrapped. Pick the dot texture for a sensory blanket, and accept the gentler wash routine as the price. Choose anti-pill fleece when practicality is the priority: the everyday blanket washed constantly, the nursery blanket for every season, the first project you want to finish in an afternoon. It is lighter, dries faster and stays smooth wash after wash. If you
CONTINUE READING ➞
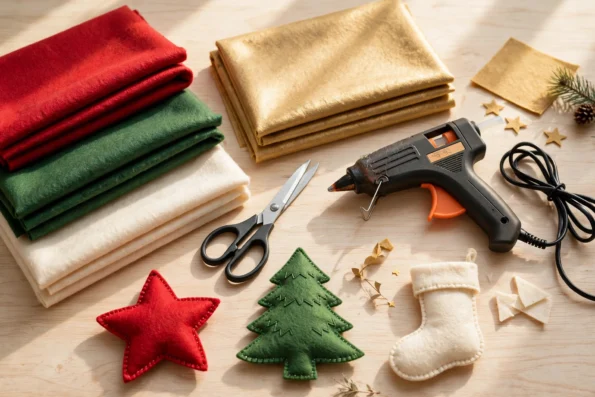
Red, green, cream and gold felt sheets with scissors, a glue gun and felt star, tree and stocking ornaments

Felt Crafts for Christmas: A Beginner’s Guide to Cutting and Gluing Felt

Felt looks easy — until your first cut goes ragged Felt is the fabric every beginner reaches for at Christmas: it does not fray, it holds its shape, and scissors plus a bottle of glue are enough to turn it into ornaments, stockings and garlands. But anyone who has tried it knows the other side. Edges come out wobbly, glue seeps through and stiffens the felt, and pieces that looked perfect on the table peel apart by morning. The good news is that all three problems have simple fixes. Cut felt the right way, pick the right glue for the job, and start with projects that forgive small mistakes, and your Christmas crafts will look shop-bought. This guide covers tools, cutting, gluing, and three beginner projects you can finish in an afternoon. Everything here uses the Premium Acrylic Felt Fabric by the Yard from ValentinaTextile.com: 100% acrylic, 72 inches wide, 1.6mm thick, non-fraying, in 40 colours — one order covers your whole project list. Why felt is the best beginner fabric for Christmas crafts Felt forgives beginners in ways almost no other fabric does. Because it is pressed, not woven, it has no grain to fight and no raw edge that unravels. Cut a star, a tree or a snowflake, and the edge stays exactly as you cut it — no hemming, no overlocking, no fray-check. The felt we use is 1.6mm thick — the sweet spot: thick enough to hold its shape, thin enough to cut with ordinary scissors. Sold by the yard in one continuous cut, a single yard gives you a generous sheet for dozens of ornaments, and the 72-inch width means a large stocking needs no joins. The tools you actually need Five things cover nearly every felt project: sharp fabric scissors (or a rotary cutter and mat for straight edges), a fabric marker or tailor’s chalk, straight pins, a low-temperature glue gun, and a bottle of clear fabric glue for detail work. A self-healing cutting mat protects your table; a metal ruler helps with garland strips. One thing worth spending on is the scissors. Dull scissors are the single biggest cause of ragged felt edges — they push the fibres instead of cutting them, leaving a fuzzy, chewed line. Keep one pair reserved for fabric only; cutting paper dulls the edge fast. How to cut felt cleanly, step by step Clean cutting is a technique, not a talent. Press the felt flat first — a low iron with a cloth barrier removes creases. Lay it on your cutting mat and pin your template with two pins so it cannot shift. Cut with long, smooth strokes, keeping the felt flat on the table — lifting it creates wavy edges. For tight curves, stop, pivot the felt (not the scissors), and continue. Short snips around curves leave a stepped edge; one slow, continuous cut leaves a smooth one. For straight strips, a rotary cutter and ruler beat scissors. Roll the cutter in one firm pass and do not go back over a half-cut line — a second pass wanders and leaves a ridge. If an edge comes out rough, a quick trim with sharp scissors fixes it — felt’s non-fraying edge means you can tidy it without the cut unravelling. How to glue felt so it actually holds Glue is where most felt projects fail, and the fix is choosing the right glue for the joint. Fabric glue is best for flat, detailed work: spread a thin layer, press the pieces together, and leave them for at least an hour. The mistake is using too much — a thick puddle soaks through, dries stiff, and shows as a dark patch. Less is more; a toothpick spreads it precisely. Hot glue is best for structural joints — ornament loops, stocking cuffs, garland pieces that get handled a lot. Use a low-temperature gun: high heat can scorch acrylic felt and leaves hard, brittle blobs. Apply, press firmly for ten seconds, and do not wiggle the joint. Hot glue grabs fast and forgives nothing once cool, so dry-fit first. For anything a child will pull at, use both: fabric glue for a neat bond, plus a hidden stitch or hot glue at stress points. Always test glue on a scrap first — a thirty-second test saves a ruined ornament. Three beginner projects to start with Start with felt ornaments. Cut two identical shapes — stars, trees, hearts — glue or stitch them together, leaving a small gap, stuff lightly with cotton wool, and close the gap. Add a ribbon loop with a dot of hot glue. A set of six takes about an hour, and any imperfect cut disappears on the tree. Next, a felt stocking: trace a stocking shape onto folded felt for a front and back in one cut, glue or stitch the edges, and add a contrasting cuff and a simple appliqué — a star, an initial, a snowflake. The 72-inch width means even an adult-size stocking cuts from a single piece, with no seams to match. Finally, a garland: cut strips in alternating Christmas colours, fold each into a loop, and glue or staple the ends to form a chain. A garland is the most forgiving project of all: one uneven piece just reads as handmade charm. For more ideas, our Christmas crafts with felt guide covers ornaments, stockings and garlands in more detail, and our 10 easy DIY felt crafts show the same skills at work in any season. Mistakes every beginner makes (and how to avoid them) First, cutting with dull scissors — it causes half of all ragged edges. Second, gluing before testing the fit; always dry-fit, then glue. Third, pressing felt with a hot iron directly on the fabric, which can flatten and shine it — always use a cloth barrier and low heat. Fourth, the wrong felt weight. Thin craft-store felt squares are fine for one ornament, but they flop and curl on larger pieces; 1.6mm premium felt holds its

CONTINUE READING ➞
My Cart
Wishlist
Recently Viewed
Categories

SPIN TO WIN!

  • Try your luck to get a discount coupon
  • 1 spin per email
  • No cheating
Try Your Lucky
Never
Remind later
No thanks