
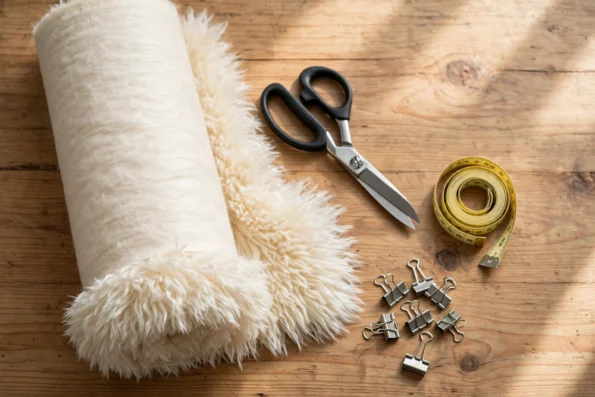
Cream shaggy faux fur fabric roll with dressmaking shears, measuring tape and binder clips

Sewing with Faux Fur: Cutting, Seaming and Shedding Tips

Faux fur looks luxurious — and sews like nothing else in your stash Faux fur turns a plain coat into a statement, a costume into a character and a throw into the softest thing in the room. It also sheds, slips, hides your seam lines under a centimetre of pile, and swallows pins whole. Sew it the way you sew cotton and you will end up with a lumpy seam and fur all over your house — sew it the way it wants to be sewn and it is surprisingly forgiving. This guide covers cutting, seaming and shedding — the three things that make or break a faux fur project — using the long-pile shaggy faux fur sold by the yard at ValentinaTextile.com. Before you cut: know your fur Our Faux Fur Shaggy fabric is 100% polyester with an extra-long, fluffy pile, 60 inches wide and sold by the yard in one continuous cut. Check the pile direction before you do anything else — run your hand across the fur and find which way it lies flat. Every pattern piece must point the same way, with the pile running downwards on a garment, or the finished piece will look two different colours in the light. Mark the wrong side clearly. On faux fur the backing is obvious — a woven or knitted base you can write on — while the right side is all pile. Use chalk on the backing only, never on the fur. And buy a little extra: faux fur eats fabric at the seams, because the pile needs trimming back at every join, and a nap layout wastes more than a plain layout. Cutting: one layer, sharp blades, no pins in the pile Cut faux fur in a single layer, right side down, with the backing facing you. Never fold it and cut two layers at once — the layers shift, the pile direction flips, and the pieces will not match. A rotary cutter with a fresh blade is the cleanest tool; sharp dressmaking shears are the alternative. Cut through the backing only, not through the pile. Hold the shears almost flat and snip just the base fabric, letting the long fibres fall free rather than slicing them short. The cut edge should look shaggy, not chopped — those long fibres are what hide the seam later. Skip the pins. Pins disappear into the pile, and every pin hole in the backing shows. Use pattern weights to hold the paper, and binder clips to hold the pieces together at the seam — they grip the backing without vanishing into the fur. If you must pin, pin only inside the seam allowance. Seaming: short stitches, long pile out of the way Use a longer stitch than you would for woven cotton — around 3 to 3.5 mm — and a universal or stretch needle in size 90/14 or 100/16. A short stitch perforates the backing and weakens the seam. Sew slowly: the pile drags against the presser foot, so guide the fabric gently and let the feed dogs do the work. Before you sew, push the pile away from the seam line: brush the long fibres back into the body of the piece so the stitch catches backing only. After sewing, pull the trapped fibres out of the seam with a pin — this one step is the difference between a visible seam and an invisible one. Trim the pile out of the seam allowance after sewing, but never before. Cut the seam allowance down to about 6 mm and snip the long fibres inside it short, so the seam lies flat. Then press it open with your fingers — never with an iron. Our shaggy fur must not be ironed: the care instructions are spot clean or dry clean, with no bleach and no ironing, because heat flattens and melts the polyester pile. A burst of steam held above the fabric can relax a crease, but keep the iron itself well away from the fur. Choose your seam by project. A plain straight seam is enough for throws, pillows and rugs. For a coat or a fursuit, use a narrow zigzag or a stretch stitch so the seam moves with the backing, and hand-baste first to stop the layers creeping. If the pile is very long, a walking foot feeds the top and bottom layers together and stops the fur bunching under the foot. Our velboa guide covers the short-pile alternative if your project needs a flatter, easier seam. Shedding: what is normal, and how to stop it Some shedding is normal with long-pile faux fur, especially on the first cut and the first few wears. What is not normal is a garment that sheds forever — that usually means cut fibres were left in the seams, or the pile was chopped short at the edges instead of being freed. After cutting, shake each piece outside and brush it with a stiff clothes brush to drop the loose fibres before you sew. A lint roller is your best friend during the project: roll the work surface, roll your clothes, roll the chair. Vacuum the sewing area after each session rather than letting fibres build up in the machine — fur fibres in the bobbin area cause skipped stitches, so clean the bobbin case with a small brush before the next project. To keep shedding down in the finished piece, seal the raw edges that will not be enclosed in a seam — a line of fray-check or a narrow zigzag along the edge locks the fibres in. Line the garment if you can: a lining stops loose fibres reaching your clothes. Wash as little as possible — spot clean or dry clean, as the care label says, and shake gently to restore the fluff. Choosing fur for your project Long-pile shaggy fur suits coats, jackets, fursuits, cosplay and mascots, where drama and texture are the point. It also makes the softest throws, rugs and cushions. Short-pile
CONTINUE READING ➞
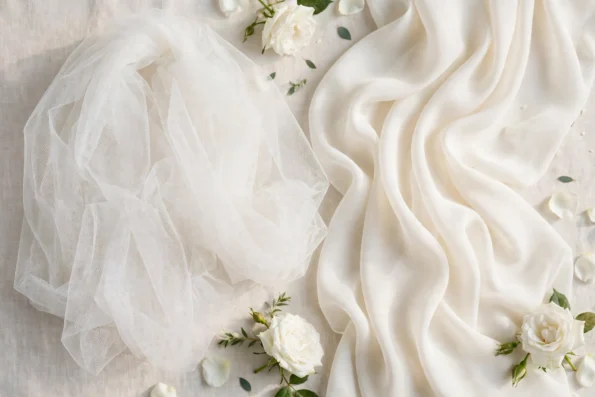
White tulle veil netting beside flowing ivory chiffon drape with white roses

Tulle vs Chiffon for Veils and Overlays

A veil is the first thing people see — and the fabric decides how it moves A veil frames the face, catches the light in every photograph and moves with every step down the aisle. Choose the wrong sheer fabric and it fights you: too stiff and it sticks out like a tent, too heavy and it pulls, too transparent and the lace detail disappears. Tulle and chiffon are the two fabrics most brides and makers reach for, and they behave very differently once they are cut, gathered and worn. This guide compares tulle and chiffon for veils and overlays — what each fabric is, how it drapes, how sheer it really is, and which one suits each veil style. Both are sold by the yard at ValentinaTextile.com. What tulle is — and why it is the classic veil fabric Tulle is a fine netting: open hexagonal mesh made from nylon or polyester, light as air and springy enough to hold a shape. It is the fabric of the classic bridal veil for a reason. A tulle veil stands away from the face instead of clinging to it, so it photographs as a soft halo around the bride, and it holds a gathered pouf or a blusher layer without collapsing. That structure is also tulle’s main limitation. Because it is a net, tulle has no fluid drape — it will not fall in soft folds the way a woven fabric does. Short tulle veils look perky and full, but a long tulle veil needs volume and fullness to look intentional. Tulle also snags, so keep it away from beading, velcro and jewellery clasps. Our Tulle & Organza collection includes tulle in bolt widths for veils and overlays, including the Tulle Bolt 54″ — a practical width for a single-panel veil with no centre seam. Buy the bolt, not the narrow roll, when the veil is wide: a seam down the middle of a veil is visible in photographs. What chiffon is — and where it beats tulle Chiffon is a woven sheer fabric, not a net. Its fine, tightly twisted yarns give it a soft, slightly grainy hand and a fluid drape that tulle cannot match. A chiffon veil or overlay falls in gentle, liquid folds, moves with the body, and catches the light in a soft shimmer rather than a sparkle. It is more opaque than tulle — still sheer, but with enough body to soften what is behind it rather than showing it plainly. That fluidity makes chiffon the better choice when the veil is meant to flow rather than float. A long, single-layer chiffon veil trailing behind a dress looks romantic and weightless in motion, and a chiffon overlay on a skirt or bodice softens the silhouette underneath without adding stiffness. Chiffon is less forgiving to sew than tulle. It slips under the presser foot, frays the moment it is cut, and shows every pin hole. Use a fine needle, a walking foot if you have one, and French seams or a rolled hem on the edges. Our Chiffon Fabric collection is sold by the yard in one continuous cut, so a long veil comes as a single piece with no joins. Tulle vs chiffon at a glance Sheerness: tulle is the more transparent of the two — you see clearly through it, which is why it suits a blusher layer worn over the face. Chiffon is sheer but softer, veiling the face or dress rather than revealing it. If the veil will be worn over the face, tulle is the traditional choice; if it is worn back, chiffon gives a prettier line. Drape: chiffon wins outright. It falls in soft folds and moves with the wearer. Tulle holds its shape and springs away from the body — beautiful for a full, airy veil. Weight: both are light, but tulle feels lighter because so much of it is air. A full tulle veil with several layers can still feel weightless; a long chiffon veil has a gentle pull you can feel on a comb or headpiece. Care: both are delicate. Keep them away from heat, steam them rather than ironing them, and store a veil rolled in tissue rather than folded — folds in tulle crease permanently, and folds in chiffon press in as lines that are hard to remove. Which fabric for which veil style? Birdcage and shoulder-length veils: tulle. Its body holds the shape, and the short length shows off its airy fullness. A chiffon veil this short has nothing to drape with and can look limp. Elbow and fingertip veils: either, and this is where the choice is really about the dress. A structured gown with a full skirt pairs well with tulle; a fluid, bias-cut or slip dress pairs better with chiffon, which echoes the dress’s movement. Floor-length and cathedral veils: chiffon for a single-layer veil that trails and photographs in motion; tulle for a multi-layer veil with volume and drama. If the veil has lace appliqué, tulle is the easier base — appliqué sits flatter on a net and the open mesh lets the lace pattern read clearly. Overlays on skirts, sleeves and bodices: chiffon. An overlay needs to fall, not stand, and chiffon layers over satin or lace without stiffening the silhouette. Tulle as an overlay works only when volume is the point — a tulle overskirt on a ballgown, for example. How much fabric do you need? A veil is cut from the fabric’s width as much as its length. For a standard single-panel veil, buy the veil length plus about 15 cm for the gathered top and the hem. A fingertip veil of about 90 cm needs roughly 1 metre of 54-inch-wide fabric; a floor-length veil of about 180 cm needs about 2 metres. For overlays, measure the garment panel the overlay will cover and add 10–15 cm on each side for the drape. Because both fabrics are sold by the yard in one continuous cut at ValentinaTextile.com,

CONTINUE READING ➞
My Cart
Wishlist
Recently Viewed
Categories

SPIN TO WIN!

  • Try your luck to get a discount coupon
  • 1 spin per email
  • No cheating
Try Your Lucky
Never
Remind later
No thanks